Red Velvet Cake for Valentine’s Day
Highlighted under: Creative Baking Recipes
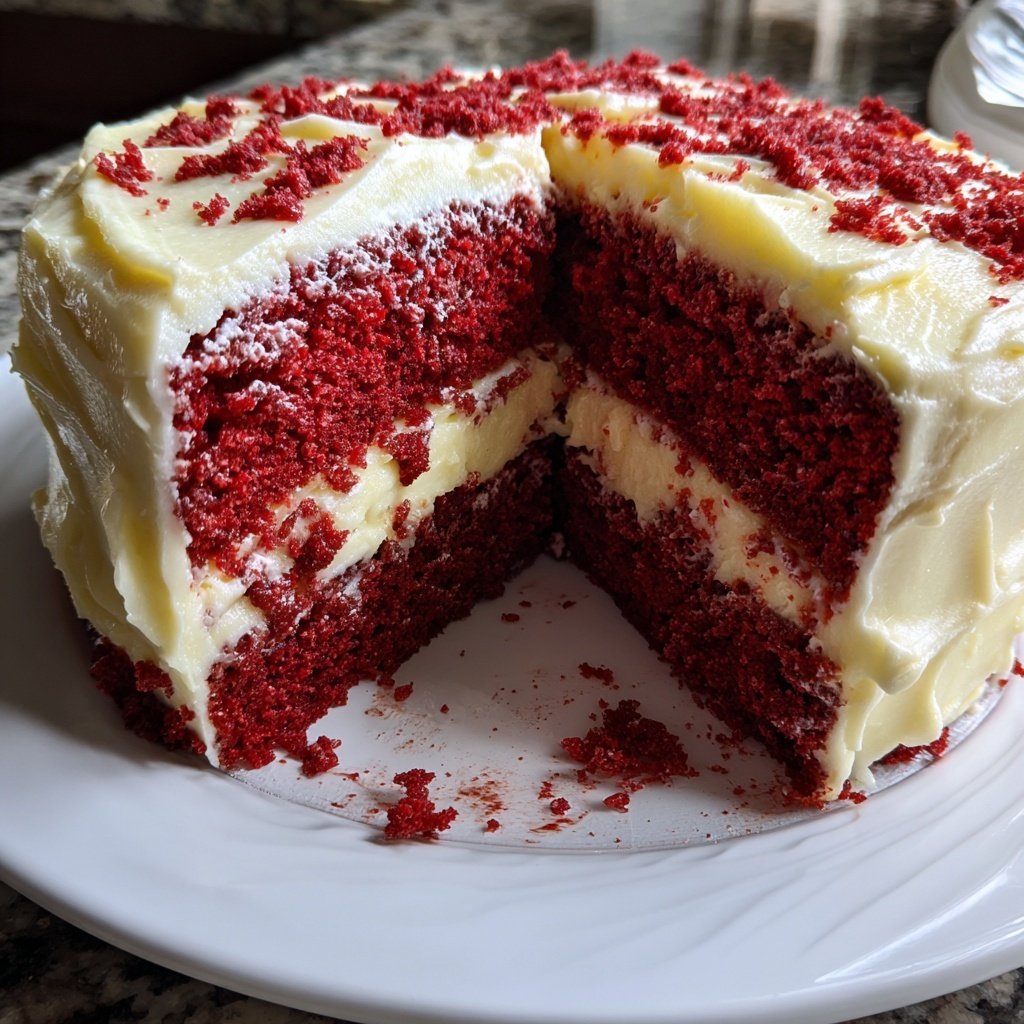
I absolutely adore baking, and there’s something special about preparing a Red Velvet Cake for Valentine’s Day. The rich color and unique flavor not only make it visually striking but also a deliciously indulgent treat. I love how the tanginess of the cream cheese frosting complements the sweet cake perfectly. This recipe has become a tradition in my home, and it’s sure to impress anyone you share it with. Join me in creating this festive and romantic dessert that is simply irresistible!
When I first attempted a Red Velvet Cake, I was enchanted by the vibrant color and the smooth texture. I found that using buttermilk really enhances the flavor and keeps the cake moist. It was a delightful surprise when my friends asked for seconds! I realized that a touch of cocoa powder gives it that unique flavor without overpowering the vanilla notes.
As I experimented with the cream cheese frosting, I discovered that balancing the sweetness was crucial. I added a pinch of salt to the frosting, and it made such a difference! This simple tweak elevated the dessert, making it not just pretty, but genuinely delicious.
Why You Will Love This Recipe
- The stunning red color instantly adds a festive touch to any celebration.
- The combination of fluffy cake and tangy cream cheese frosting is utterly delightful.
- Baking this cake creates cherished memories with loved ones.
Understanding Red Velvet Cake
Red velvet cake is not just about its vibrant hue; it’s a delightful combination of flavors and textures. The slightly tangy buttermilk pairs beautifully with the sweetness of the sugar, creating a cake that’s moist and rich without being overly heavy. The cocoa powder adds a subtle depth to the flavor, giving the cake a unique, sophisticated twist that sets it apart from more traditional vanilla or chocolate cakes.
The use of vegetable oil is a key component in achieving the perfect texture. Unlike butter, which can create a denser cake, oil helps to keep the cake exceptionally moist and light. This is particularly important when serving the cake layered with the rich cream cheese frosting, as the balance of flavors and textures is what makes each bite so enchanting.
Perfecting the Cream Cheese Frosting
The cream cheese frosting is what elevates this red velvet cake into a showstopper. It strikes the perfect balance between creamy and tangy, which complements the sweet cake remarkably well. When making the frosting, ensure the cream cheese and butter are at room temperature for a smoother blend. Beat them until the mixture is light and fluffy; this process not only helps incorporate air but also contributes to a velvety texture that spreads easily over the cake.
If you prefer a sweeter frosting, don’t hesitate to adjust the powdered sugar to your taste. A pinch of salt enhances the overall flavor profile, cutting through the sweetness and adding complexity. When applying the frosting, I like to create a rustic finish by using an offset spatula, giving it a homemade touch that feels warm and inviting.
Ingredients
Gather these ingredients to make your Red Velvet Cake:
For the Cake
- 2 ½ cups all-purpose flour
- 1 ½ cups granulated sugar
- 1 tsp baking soda
- 1 tsp salt
- 1 tsp cocoa powder
- 1 ½ cups vegetable oil
- 1 cup buttermilk, room temperature
- 2 large eggs, room temperature
- 2 tbsp red food coloring
- 1 tsp vanilla extract
- 1 tsp white vinegar
For the Frosting
- 8 oz cream cheese, softened
- ½ cup unsalted butter, softened
- 4 cups powdered sugar
- 1 tsp vanilla extract
- A pinch of salt
Make sure to have all the ingredients measured and ready for a smooth baking process!
Instructions
Follow these steps for the perfect Red Velvet Cake:
Preheat the Oven
Preheat your oven to 350°F (175°C) and grease two 9-inch round cake pans.
Mix Dry Ingredients
In a large bowl, sift together the flour, sugar, baking soda, salt, cocoa powder, and set aside.
Combine Wet Ingredients
In another bowl, whisk together the oil, buttermilk, eggs, red food coloring, and vanilla extract.
Combine the Mixtures
Gradually add the dry ingredients to the wet ingredients, mixing until just combined. Finally, stir in the vinegar.
Bake the Cakes
Pour the batter evenly into the prepared pans and bake for 30 minutes, or until a toothpick comes out clean.
Prepare the Frosting
In a mixing bowl, beat together the cream cheese and butter until creamy. Gradually add the powdered sugar, vanilla, and salt, mixing until smooth.
Assemble the Cake
Once the cakes are cool, frost the top of one layer, place the second layer on top, and frost the sides and top generously.
Let the cake set for about 30 minutes before slicing to allow the frosting to firm up!
Pro Tips
- For an extra pop of flavor, consider adding a teaspoon of almond extract to the cake batter. It pairs wonderfully with the chocolate and vanilla notes.
Baking Tips and Techniques
When you're baking the cakes, it’s crucial to properly prepare your baking pans. Grease them well to prevent sticking and consider lining the bottom with parchment paper for easy removal. After baking, let the cakes cool in the pan for about 10 minutes before inverting them onto a wire rack. This step helps avoid breakage and ensures the cakes retain their shape while cooling.
Keep an eye on the baking time, as oven temperatures can vary. Start checking the cakes a few minutes before the recommended time by inserting a toothpick into the center. The cakes are done when the toothpick comes out clean or with just a few moist crumbs attached, not wet batter.
Storing and Serving Suggestions
If you plan to make the cake ahead of time, both the cake layers and the frosting store well. You can keep the unfrosted cake layers in the refrigerator, wrapped tightly in plastic wrap, for up to three days. Alternatively, freeze them for up to three months. To freeze, ensure they are completely cool, and wrap them well to prevent freezer burn.
Serving red velvet cake is an opportunity for creativity. Consider garnishing with chocolate shavings or fresh berries for a pop of color and flavor. For an extra indulgent touch, a drizzle of chocolate ganache over the frosted cake adds a luxurious finish that no one can resist. Cut the slices generously for a visual treat, and enjoy the reactions when your loved ones see—and taste—this stunning dessert!
Questions About Recipes
→ Can I use a different type of food coloring?
Yes, you can use gel food coloring for more vibrant results, but red food coloring is traditional for this recipe.
→ How do I store leftovers?
Store leftover cake in an airtight container in the refrigerator for up to 5 days.
→ Can I freeze the cake?
Absolutely! Wrap the cake layers tightly in plastic wrap and freeze for up to 3 months.
→ What can I substitute for buttermilk?
You can mix 1 cup of milk with 1 tablespoon of vinegar and let it sit for 5 minutes to create a buttermilk substitute.

Red Velvet Cake for Valentine’s Day
Created by: Florence Keaton
Recipe Type: Creative Baking Recipes
Skill Level: Intermediate
Final Quantity: 8 servings
What You'll Need
For the Cake
- 2 ½ cups all-purpose flour
- 1 ½ cups granulated sugar
- 1 tsp baking soda
- 1 tsp salt
- 1 tsp cocoa powder
- 1 ½ cups vegetable oil
- 1 cup buttermilk, room temperature
- 2 large eggs, room temperature
- 2 tbsp red food coloring
- 1 tsp vanilla extract
- 1 tsp white vinegar
For the Frosting
- 8 oz cream cheese, softened
- ½ cup unsalted butter, softened
- 4 cups powdered sugar
- 1 tsp vanilla extract
- A pinch of salt
How-To Steps
Preheat your oven to 350°F (175°C) and grease two 9-inch round cake pans.
In a large bowl, sift together the flour, sugar, baking soda, salt, cocoa powder, and set aside.
In another bowl, whisk together the oil, buttermilk, eggs, red food coloring, and vanilla extract.
Gradually add the dry ingredients to the wet ingredients, mixing until just combined. Finally, stir in the vinegar.
Pour the batter evenly into the prepared pans and bake for 30 minutes, or until a toothpick comes out clean.
In a mixing bowl, beat together the cream cheese and butter until creamy. Gradually add the powdered sugar, vanilla, and salt, mixing until smooth.
Once the cakes are cool, frost the top of one layer, place the second layer on top, and frost the sides and top generously.
Extra Tips
- For an extra pop of flavor, consider adding a teaspoon of almond extract to the cake batter. It pairs wonderfully with the chocolate and vanilla notes.
Nutritional Breakdown (Per Serving)
- Calories: 350 kcal
- Total Fat: 18g
- Saturated Fat: 8g
- Cholesterol: 70mg
- Sodium: 320mg
- Total Carbohydrates: 45g
- Dietary Fiber: 1g
- Sugars: 26g
- Protein: 5g